When you first install and activate the Stripe Payments Plugin, a products/shop page is automatically created for you. The purpose of the products page is to display all the products that you create inside the plugin in a nice grid display.
Your products are displayed with the name, price and a link to view the details. By default, your shop page will display 30 products per page and have a search bar towards the top.
You can add the shop page to your website’s navigation menu if you want to. This way your customers can easily find the products and services you have available.
Table of Contents
- Viewing the Shop Page
- Adding the Shop Page to a Navigation Menu
- How to Create a Shop Page if it gets Deleted
- Removing the Search Bar from the Shop Page
- Sorting the Products Listing (Sort Order)
- Editing the Number of Items on Each Page
Viewing the Shop Page
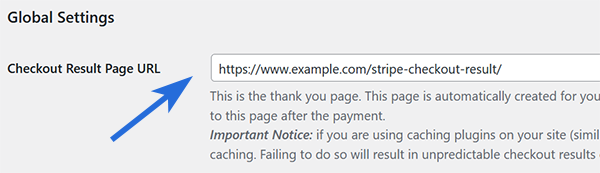
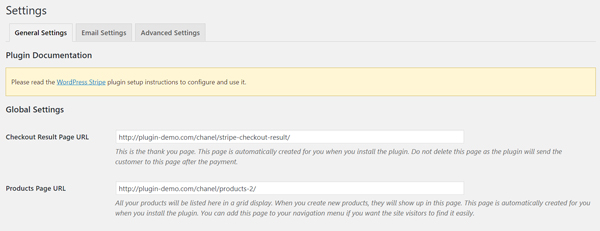
The URL of your product’s shop page can be found under the stripe payments ‘Settings’ menu. Under ‘General Settings’, you will see ‘Products Page URL’. You can paste this URL into your browser to view your shop page.
Example: Shop Page URL
The URL of your shop page can be found under the ‘General Settings’ tab.
Example: Previewing a Shop Page
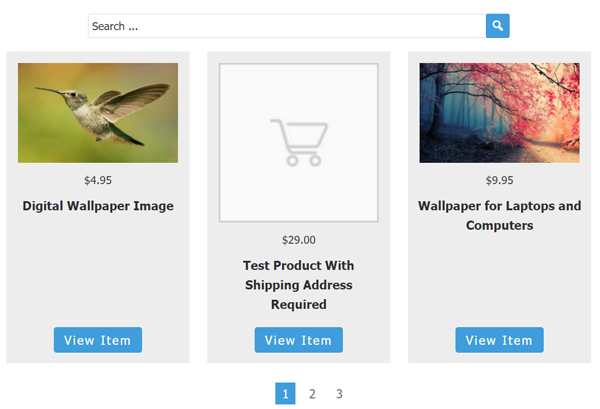
This example shows a shop page that contains several different products.
Adding the Shop Page to a Navigation Menu
You can easily add the shop page to the navigation menu of your site if you want to.
- Click on ‘Menus’ under the ‘Appearance’ tab.
- Once you are in ‘Menus’, click the drop down option for ‘Pages’. Tick the ‘Products’ page.
- Click the ‘Add to Menu’ button.
- Drag the ‘Products’ page to where you would like it to show up on your navigation menu.
- Ensure you ‘Save Menu’.
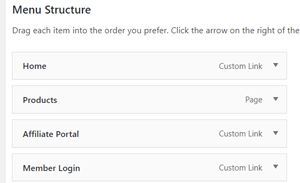
Example: Adding Shop Page to Navigation Menu
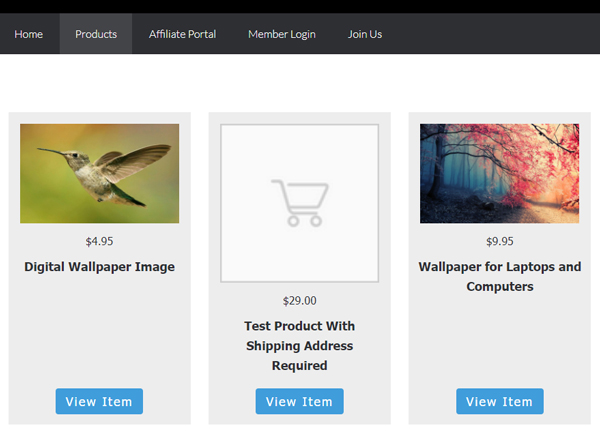
Example: Navigation Menu
After you add your shop page to the navigation menu, your visitors can easily browse your products and services.

How to Create a Shop Page if it gets Deleted
If your shop page accidentally gets deleted, you can follow these steps to create a new one.
Step 1) Create a new page and title it ‘Products’ or ‘Shop’.
Step 2) In the body of the page you will need to enter in the following shortcode:
[asp_show_all_products]
Step 3) Publish the page.
Step 4) Copy the permalink of this page (you can add this URL to your navigation menu if you want to).
Removing the Search Bar from the Shop Page
Your shop page will contain a search bar by default. Your customers can use it to search your items.
You can remove the search bar from the shop page by adding an extra parameter to the shortcode.
- Find the page titled ‘Products’ from the pages menu of your dashboard.
- If you add search_box=”0″ to the shop page shortcode, the search bar will be removed. Simply delete the shortcode on your ‘Products’ page and paste in the following shortcode (ensure you update changes made to this page):
[asp_show_all_products search_box="0"]
Example: Search Bar Removed
Sorting the Products Listing (Sort Order)
By default, the product listings on the shop page are displayed in ascending order, meaning the items appear in the order they were added.
You can customize the shortcode to set a different default sorting order for the shop page. Visitors can still use the sorting dropdown menu to change the order as needed.
For example: You can edit the shortcode and use the ‘sort_by’ and ‘sort_order’ parameters to sort the listing in descending order. Below is an example shortcode that will list the products by ID and using a descending sort order:
[asp_show_all_products sort_by="ID" sort_order="DESC"]
The following example sorts the products by title in descending order:
[asp_show_all_products sort_by="title" sort_order="DESC"]
The shortcode you use on the page determines the default order in which the products are displayed. However, users will always be able to choose a different sorting option from the dropdown menu.
Editing the Number of Items on Each Page
If you are selling multiple products from your site, you may wish to edit how many products are visible per page. Without making changes to the shortcode, by default it will show up to 30 products per page. It will create pagination if you have more than 30 items.
Adding an extra parameter to the shortcode allows you to edit the number of items shown on each page.
- Find the ‘Products’ page in the ‘Pages’ menu of your dashboard.
- By adding, items_per_page=”20″ into the shortcode, you can decide on how many products you wish to show per page.
The following shortcode can be pasted into your ‘Products’ page. You will then need to replace 20 with the amount of products you wish to display per page.
[asp_show_all_products items_per_page="20"]
Example: Adding Parameter to Shortcode
This shortcode allows you to decide how many products you would like to display per page.
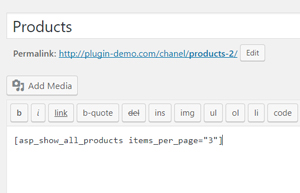
Example: Shop with Three Products Per Page