The Enterprise reCAPTCHA feature allows you to protect your Stripe payment buttons from bots and card testers.
The Google Enterprise reCAPTCHA uses Google Cloud. So you will need to create a free Google cloud account for it.
The Enterprise reCAPTCHA feature of our plugin is currently in Beta.
This plugin uses Stripe elements (their UI building blocks) to offer a fast, easy and unique checkout experience. This is great for your own branding. However, to prevent card testing issue with Stripe elements, captcha is recommended. Please fully read the card testing issue explained on Stripe’s website before you use this plugin.
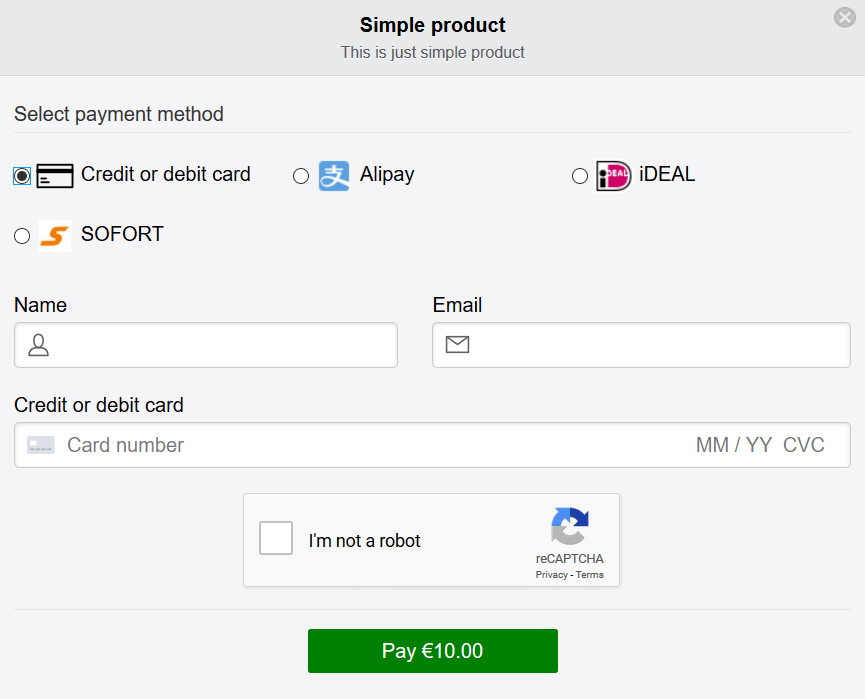
When you enable this feature, the captcha option will appear when customers click a Stripe payment button. They will simply need to check a box that confirms they are human. This prevents robots from abusing the payment button on your site.
Table of Contents
- Configuring Enterprise reCAPTCHA on Your Website
- Step 1) Create a Google Cloud Project
- Step 2) Enable reCAPTCHA Enterprise API
- Step 3) Create Site Key (for reCAPTCHA Enterprise)
- Step 4) Create API Key (for Google Cloud)
- Step 5) Project ID (of the Google Cloud Project)
- Customer’s View When Enterprise reCaptcha is Enabled
Configuring Enterprise reCAPTCHA on Your Website
Follow the steps below to configure Enterprise reCaptcha for your site:
- Click on the Stripe Payments -> Settings menu.
- Click on the Captcha tab.
- Mark the checkbox Enterprise reCaptcha.
- You will need to enter in your Google Enterprise reCAPTCHA API details.
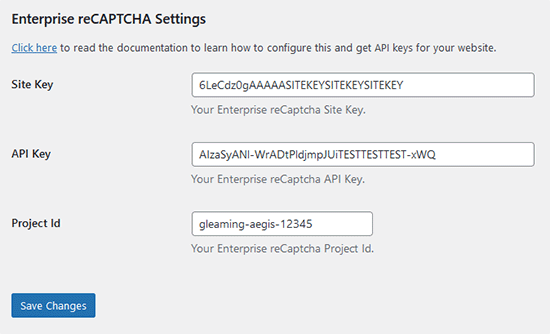
I have outlined how to get the Site Key, API Key and the Project ID for Enterprise reCAPTCHA in the following section.
Step 1) Create a Google Cloud Project
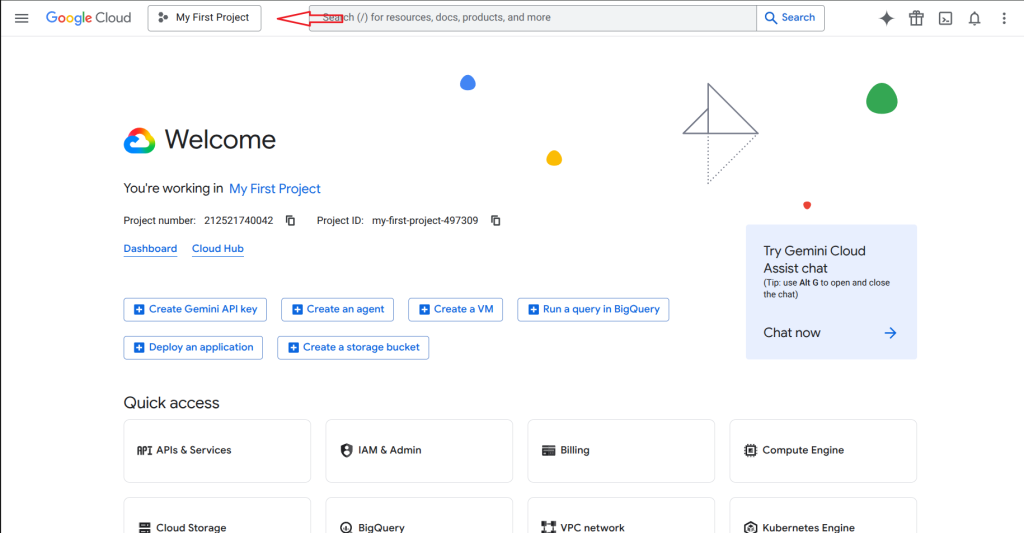
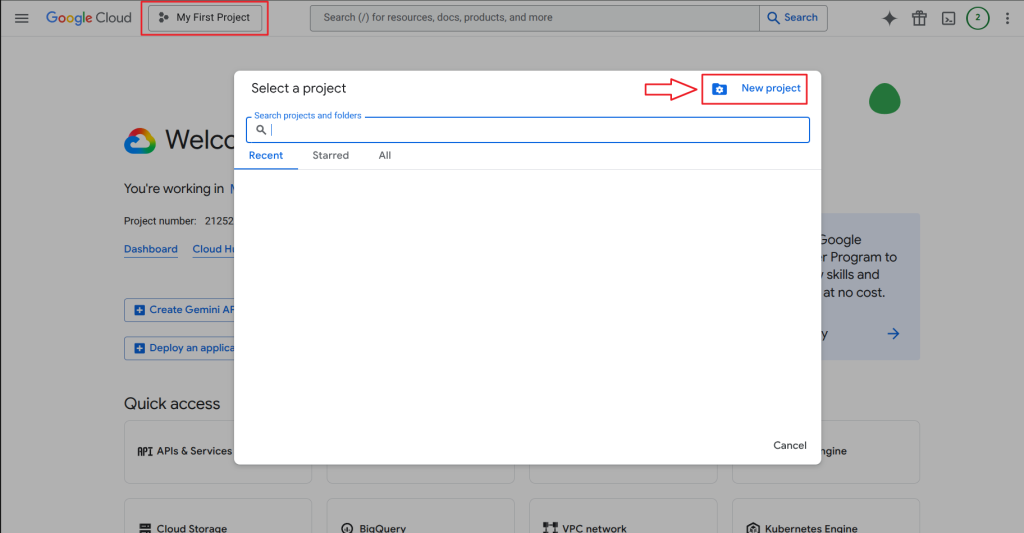
If you don’t already have a project created in your Google Cloud Console, then go ahead and create a new project. You can create a separate project for each of your sites or use the same project for multiple sites.
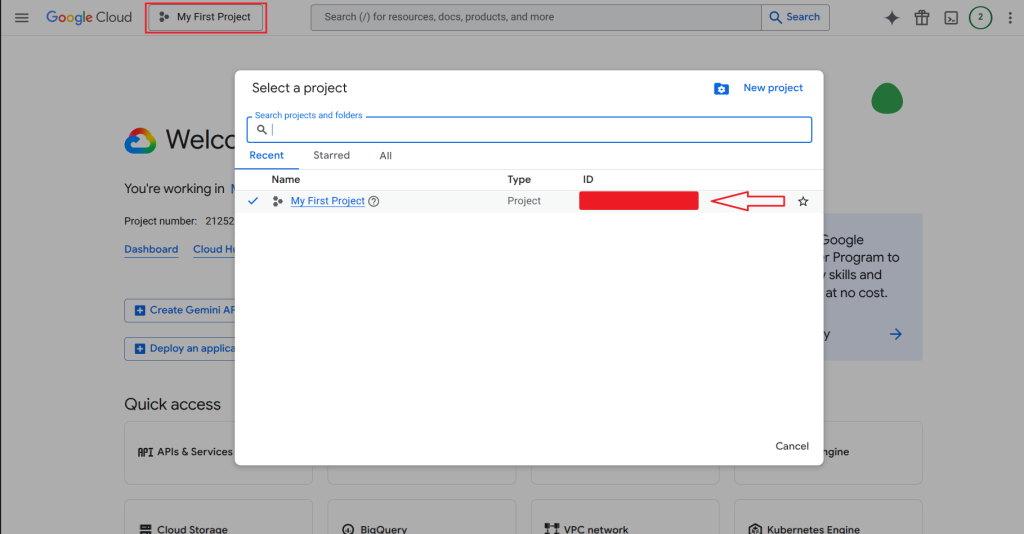
The following screenshot shows where you can see the Google Cloud Project.
If you don’t have a project already then create a new project by clicking on the New Project Button. See the following screenshot.
You can use any simple name for the project. The rest of the details are optional.
After the project is created, select the newly created project and do the following steps to enable reCAPTCHA Enterprise and get your API key.
Step 2) Enable reCAPTCHA Enterprise API
The following steps outline how to get Site Key of Enterprise reCAPTCHA
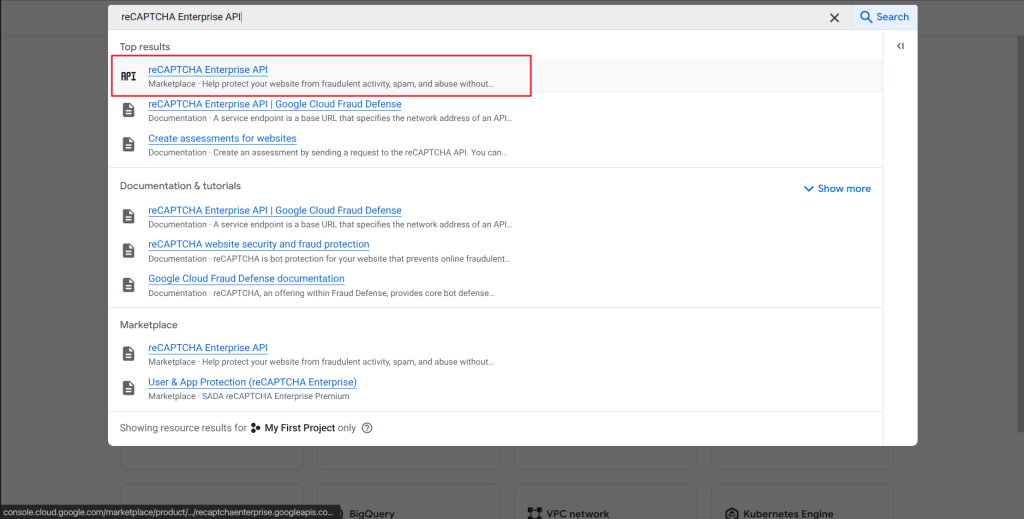
- Go to the Google Cloud Console.
- Search using the word “reCAPTCHA Enterprise API”.
- Click on reCAPTCHA Enterprise API.
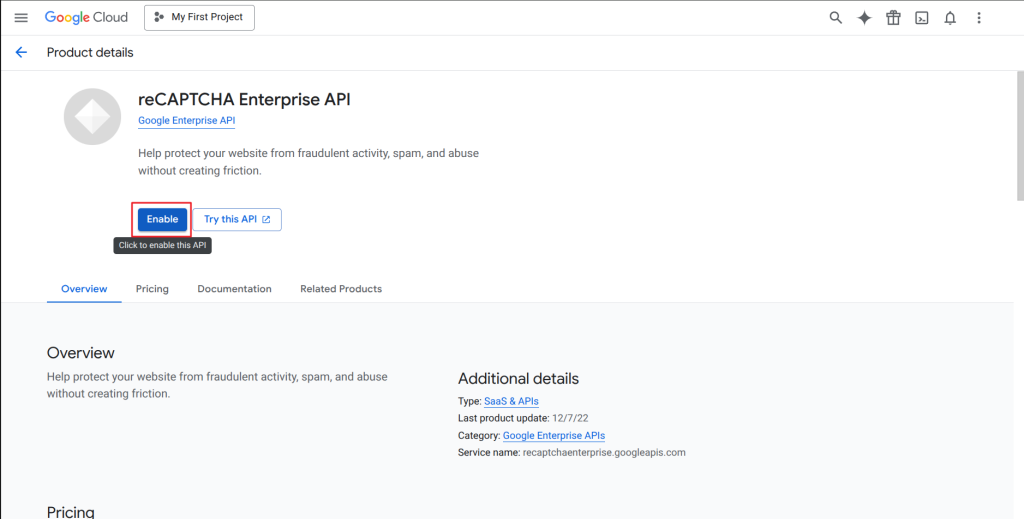
Click the “Enable” button to enable the reCAPTCHA Enterprise API.
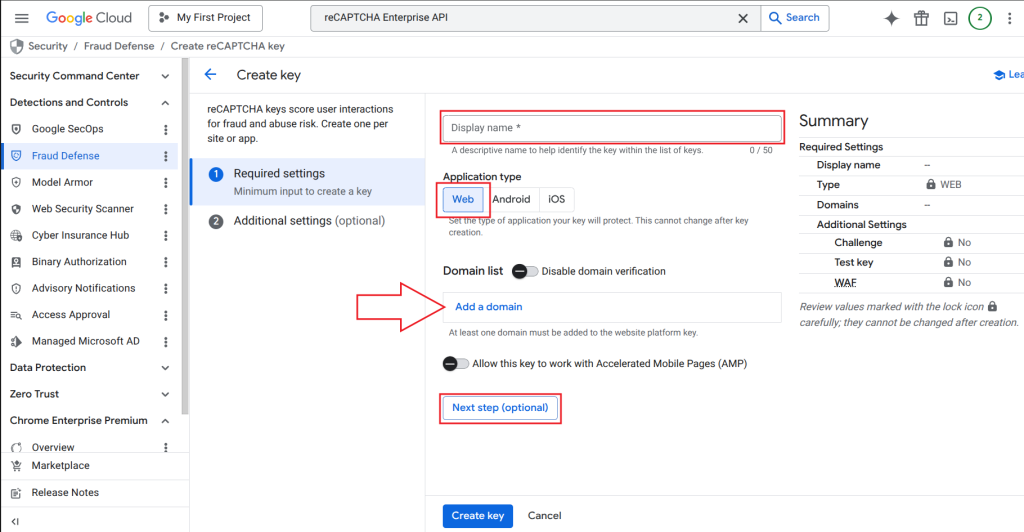
Step 3) Create Site Key (for reCAPTCHA Enterprise)
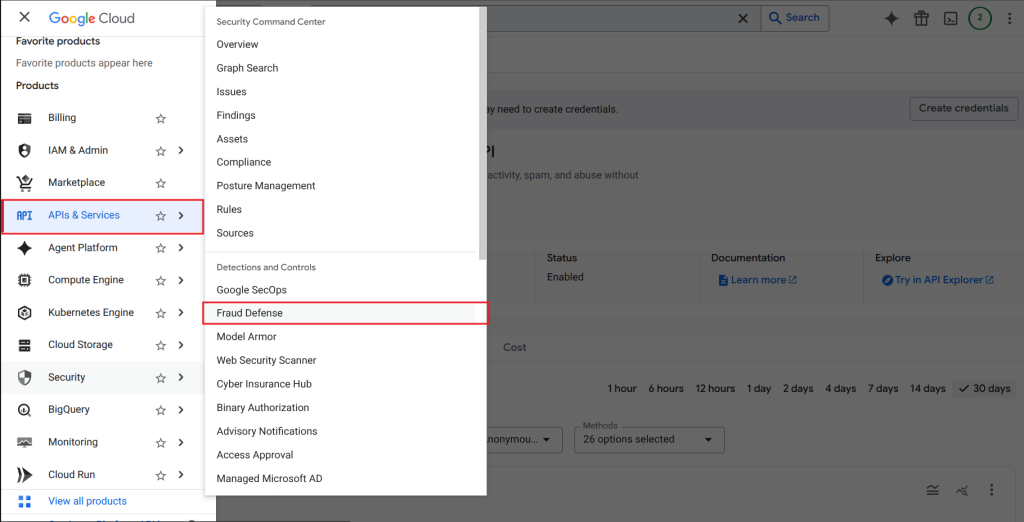
Open the “Navigation Menu” by clicking the hamburger menu icon in the top left corner and then click Security > Fraud Defense.

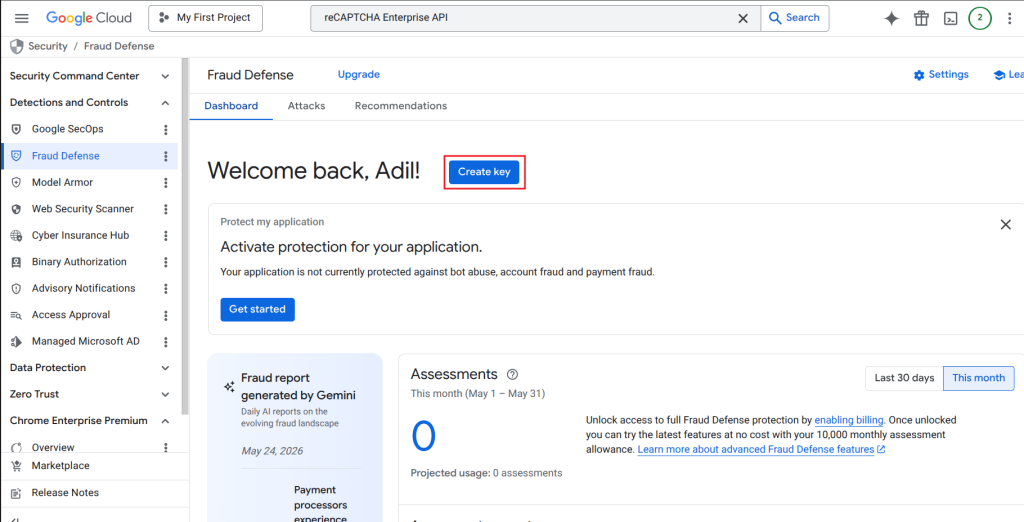
Click the “Create Key” button.
Fill in the details and click the “Next Step (optional)” button. Make sure to add your website’s domain if you’re not disabling domain verification.
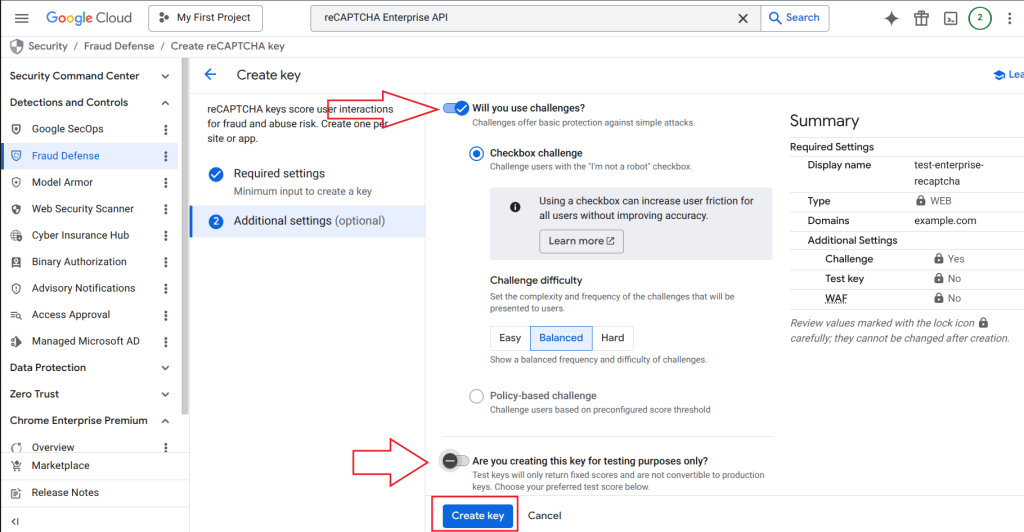
Configure your required challenge type that will be presented to the visitor. You can optionally toggle “Are you creating this key for testing purposes only?” for testing.
After all is done, click “Create Key” to finish creating the site key.
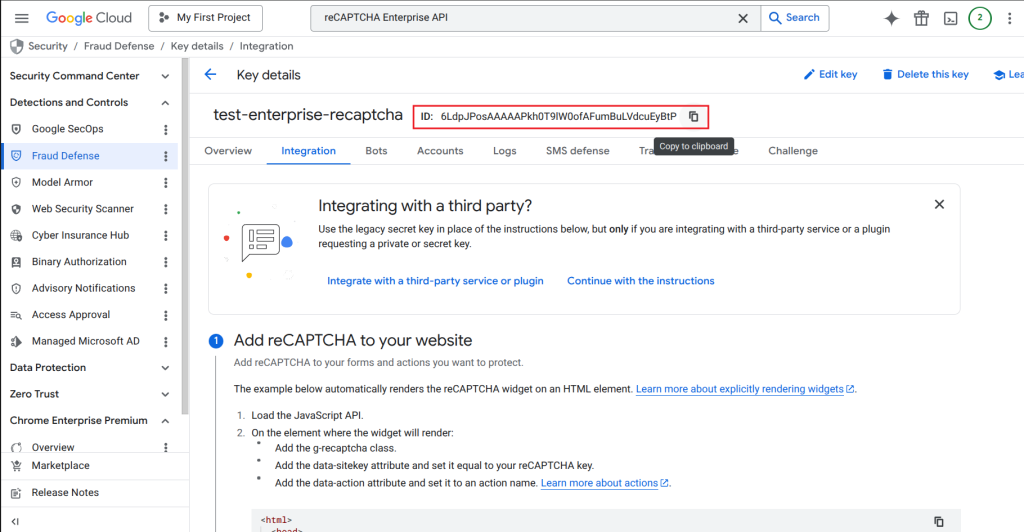
Copy and paste the Site key into the plugin’s settings menu.
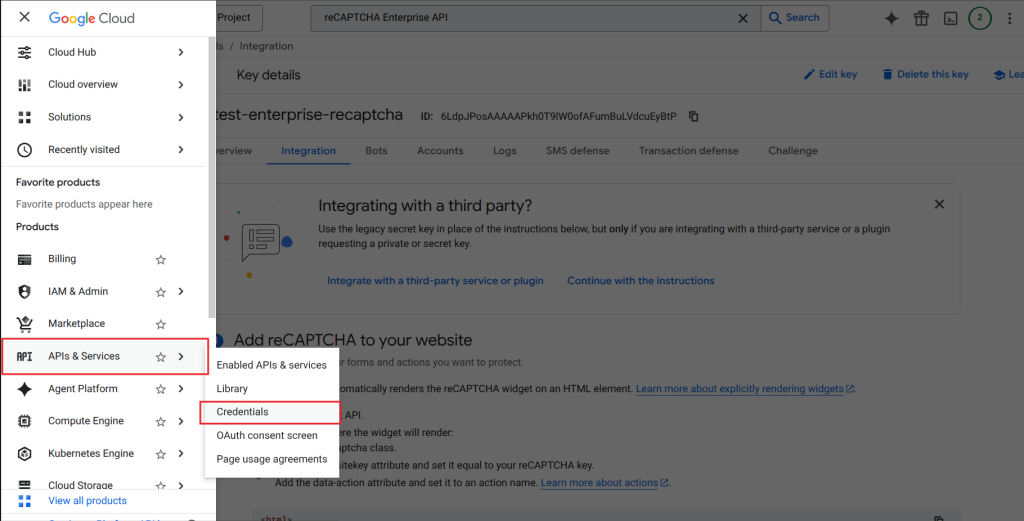
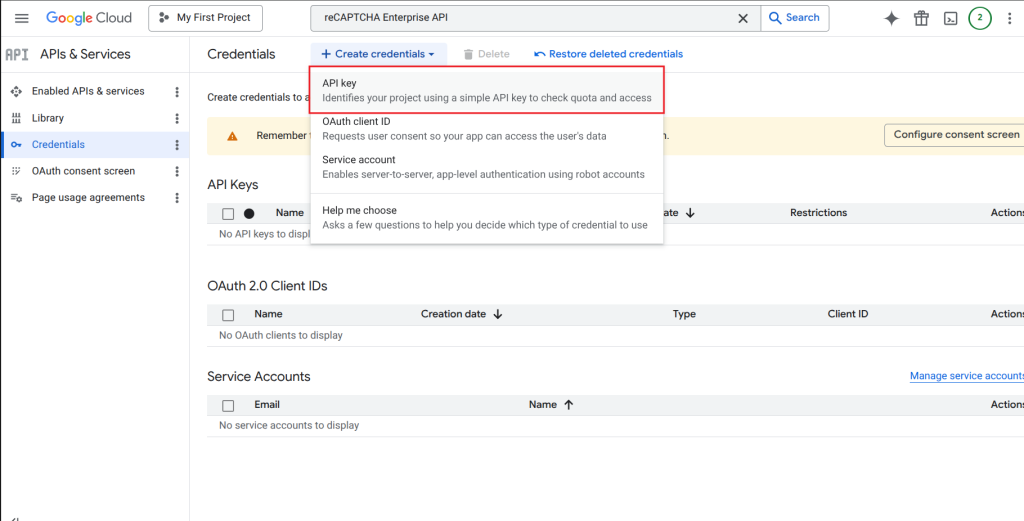
Step 4) Create API Key (for Google Cloud)
The following steps outline how to get API Key for Google Cloud
- Click on the Google Clouds menu (hamburger menu)
- APIs & Services -> Credentials
Click on the Create Credentials button then click on API key to generate an API key.
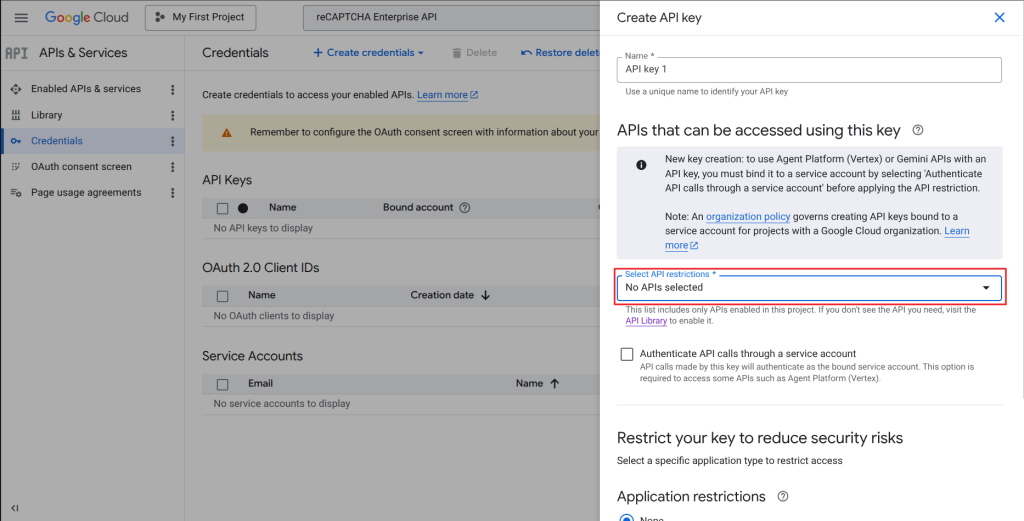
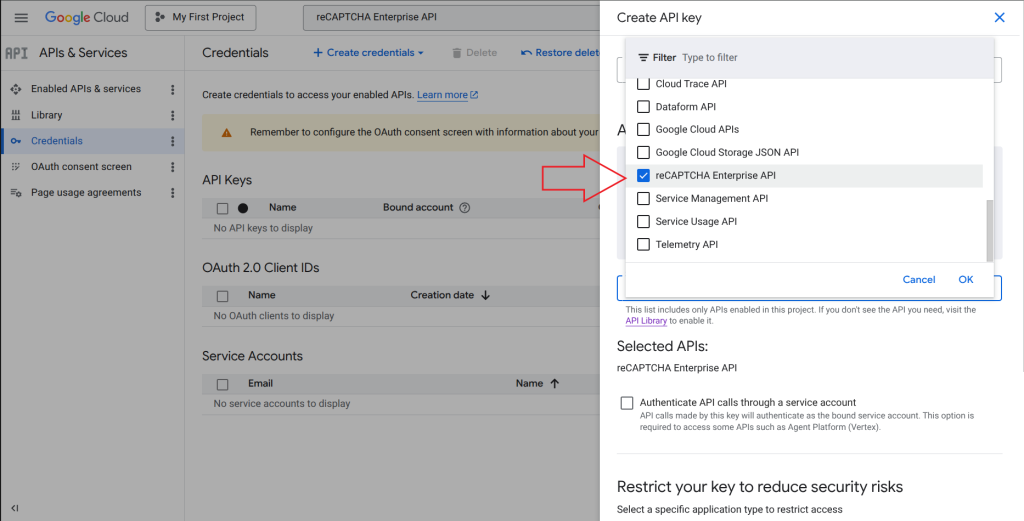
In the “Select API restrictions” input, make sure to select “reCAPTCHA Enterprise API“. Then hit the “Create” button to finish creating the API Key.
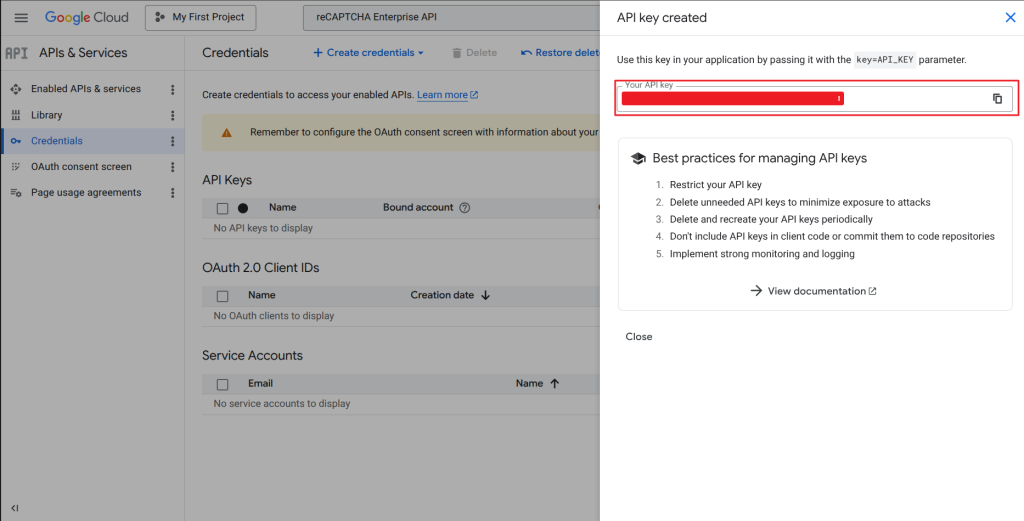
Copy and paste the generated API key into the plugin’s settings menu.
Step 5) Project ID (of the Google Cloud Project)
Click on the project selection drop-down. It will show all the projects and their IDs. You can copy & paste the project ID from this interface.
You now have all the details that you can paste into the settings menu of the plugin to enable the reCAPTCHA Enterprise option.
Customer’s View When Enterprise reCaptcha is Enabled
Once the Enterprise reCaptcha feature is enabled, anyone wishing to complete the checkout will need to select the captcha checkbox.