The Stripe Payments Plugin can be used to sell products from the entirety of your website through the Stripe Payment gateway.
This feature is deprecated. It is not recommended to use this option. Instead, please create a product inside the plugin and then use that product on your site.
Normally, you will create a product then put the payment button for that product anywhere on your site (example: a landing page). However, there is another option in the plugin that you can use to create a payment button where you enter the item info in the shortcode (without creating a product in the admin dashboard). In this tutorial I will show you how to use this alternative shortcode to create a Buy Now button for an item.
Creating a Payment Button for a Digital Item
To create a buy now button for your digital product copy and paste the following shortcode in the text view of the WordPress editor:
[accept_stripe_payment name="Cool Script" price="50" url="http://example.com/downloads/my-script.zip" button_text="Buy Now"]
Once you have pasted the shortcode onto your WordPress page, you will need to customize each field with your product’s name, price and the URL of your downloadable item (ensure the downloadable item is uploaded in the media library of your site). You can customize the text of the “Buy Now” button if you wish.
Example: Custom stripe payments shortcode for a digital product

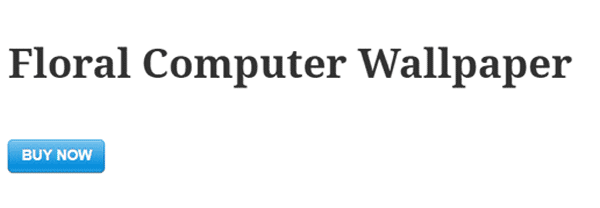
Example: “Buy Now” button using stripe payments shortcode

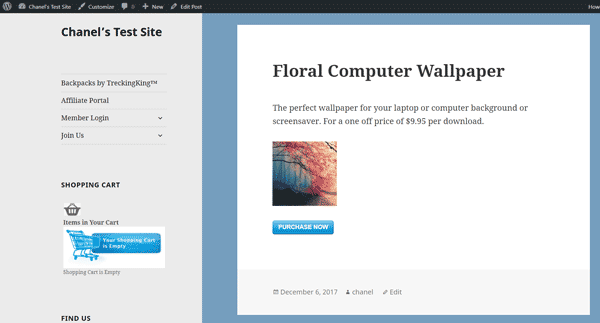
If you wish, you can add a title for your page, text including the price of your product in the descriptions field of your page and upload an image of the product. This will add details to your product and make it look nice.
Example: Product page with a title, description, thumbnail image and use of the product shortcode.

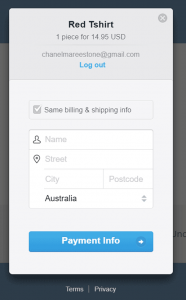
Once a customer clicks on the “Buy Now” button they are easily able to checkout using their credit card. The name, price and quantity of the product they are purchasing will be shown in the payment popup window.

After a successful purchase, the customer will be automatically redirected to a thank you page (the plugin created this plugin when you installed it the first time – do not delete this page) where they will be given a link to download the product. The thank you page will look similar to the one below:

Creating a Payment Button for a Physical Item
Similar to the way in which you use a shortcode to create a “Buy Now” button for a digital product although when creating a payment button for a physical item you will need extra parameters in the shortcode. The parameters will prompt the Stripe checkout form to ask your customer for a billing and shipping address.
Copy and paste the shortcode into any page of your site and customize each field with your product’s name and price. Leave the billing and shipping information as “1”. If you only want to ask for one of the two fields, such as a billing address you can delete the shipping address from the shortcode and vise versa.
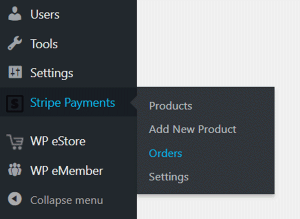
Your customer’s billing and shipping information can then be found under the ‘Orders’ tab in the ‘Stripe Payments’ plugin menu.
Use the shortcode below when selling a physical item:
[accept_stripe_payment name="Cool Script" price="50" button_text="Buy Now" billing_address="1" shipping_address="1"]
Example: Customized shortcode for a physical item including billing and shipping address

Example: By using the address parameter, your customer’s billing and shipping details will be collected

Viewing Your Customer’s Orders
To view orders and the customer’s information you will need to go to the ‘Orders’ tab under the ‘Stripe Payments’ plugin menu.
By clicking on each order you will be able to view more information including the time they purchased the item, what they have purchased, the amount they have paid and customer details including email and their billing/shipping address (where applicable).


Additional Shortcode Parameters/Options
There are some additional optional shortcode parameters that you can use with this shortcode to customize a few things. See details below.
Specifying a Custom Quantity for the Item
You can optionally add quantity for the item/product that you want to sell. Use the “quantity” parameter in the shortcode. See example shortcode below:
[accept_stripe_payment name="Cool Product" price="25.00" button_text="Pay Now" quantity="3"]
You can create multiple Stripe buttons with different quantities and put them on your landing page.
Adding a Logo to the Stripe Payment Window
You can optionally show an item logo in the Stripe payment window. Specify the logo image URL using the “item_logo” parameter in the shortcode. See example below:
[accept_stripe_payment name="Cool Product" price="25.00" button_text="Pay Now" item_logo="http://your-domain.com/product-logo.png"]
Adding a Custom Charge Description for the Item
You can optionally add a custom description for the item/product/service that will get shown in the stripe checkout/payment window of the item. Specify the description using the “description” parameter in the shortcode. See example shortcode below:
[accept_stripe_payment name="Cool Product" price="25.00" button_text="Pay Now" description="This is a test item description"]
Specifying a Currency Code in the Shortcode
You can optionally specify a currency code in the shortcode to accept payment in a different currency than the one you configured in the settings. This allows you to create different buttons that charge money in different currencies. See example shortcode below:
[accept_stripe_payment name="Cool Product" price="25.00" button_text="Pay Now" currency="USD"]
You can find a list of supported currency codes from Stripe’s site.
Specifying a Checkout Popup Language
By default, Stripe tries to autodetect and set user’s preferred language. However, in some situations, you may want to force Stripe to use a specific language for your shortcode.
In addition to English (en) language, Stripe supports the following checkout popup languages:
- Simplified Chinese (zh)
- Danish (da)
- Dutch (nl)
- English (en)
- Finnish (fi)
- French (fr)
- German (de)
- Italian (it)
- Japanese (ja)
- Norwegian (no)
- Spanish (es)
- Swedish (sv)
You can use checkout_lang shortcode parameter to set specific language. For example, to set Spanish language, use it’s code (es):
[accept_stripe_payment name="Cool Product" price="25.00" button_text="Pay Now" checkout_lang="es"]
This parameter also works for product shortcode:
[asp_product id="123" checkout_lang="es"]