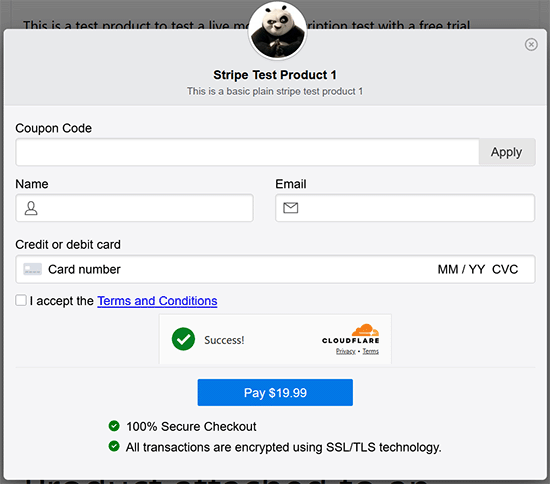
You can easily add Cloudflare Turnstile CAPTCHA to the payment form of the Accept Stripe Payments plugin using our Bot Protection with Turnstile plugin.
This integration helps block spam, bots, and fraudulent activity from abusing your Stripe checkout forms while maintaining a smooth experience for real users.
Cloudflare Turnstile CAPTCHA is smooth and user-friendly. If you haven’t tried it yet, it’s definitely worth a shot.

Table of Contents
Enabling Cloudflare Turnstile CAPTCHA
Step 1) Install and Activate the Bot Protection Plugin
Follow these steps to install and activate our Bot Protection with Turnstile plugin
- Go to your WordPress admin dashboard.
- Navigate to Plugins > Add New.
- Search for Bot Protection with Turnstile.
- Click Install Now and then Activate.
Alternatively, you can download the plugin from WordPress.org and upload it manually.
Step 2) Generate Turnstile API Keys
- Visit Cloudflare Turnstile Dashboard (you’ll need a free Cloudflare account).
- Click “Add Widget”.
- Enter a name for your widget and your domain (you can add multiple domains if needed).
- Click Create.
- Copy the Site Key and Secret Key from the widget details.
Step 3) Configure the Plugin
- In your WordPress dashboard, go to Settings menu of the Bot Protection plugin.
- Paste your Site Key and Secret Key into the corresponding fields.
- Click on the eCommerce Integrations menu.
- You will see a menu tab for the Accept Stripe Payments plugin.
- Check the box labeled: Payment/Checkout Form.
- Click Save Changes.
Step 4) Test the Integration
Now, visit a page where you’ve embedded a product from the Accept Stripe Payments plugin. You should see the Turnstile CAPTCHA displayed just before the payment button.
Try doing a test transaction to make sure the CAPTCHA works correctly.
Notes
- The Accept Stripe Payments plugin includes other CAPTCHA features (example: Google reCAPTCHA). If you’ve previously enabled that, be sure to disable it to avoid seeing double CAPTCHA.
- Cloudflare Turnstile is privacy-focused and does not track users, making it an ideal alternative to traditional CAPTCHA services.
Troubleshooting
If you don’t see the CAPTCHA appearing:
- Double-check that your API keys are correct.
- Clear any site caching and try again.
- Ensure the Turnstile integration option for Stripe Payments is enabled in the settings.