Post Payment Actions are triggered after a successful Stripe Payments transaction has been completed. This allows admin to customize messages sent to specific customers.
For example, you may wish to notify customers who purchase a physical product that it will take up to 2 days to be shipped, or notify customers who purchase a digital product that the download link is time sensitive. Customizing emails on a per product basis can be handled using the Post Payment Actions Addon.
Table of Contents
- Installation and Activation of the Addon
- Post Payment Action – Customized Emails
- Disable Sending Notification Emails on a Per-Product Basis
- Get the Stripe Post Payment Actions Addon
- Alternatively, Choose to Bundle & Save
Installation and Activation of the Addon
Take the following steps to install this addon:
- Click on the Add New menu under the plugins interface.
- Click on the Upload Plugin button and select the addon’s zip file.
- Hit the Install Now button and then activate the addon.
Post Payment Action – Customized Emails
When using this addon, you can customize the subject, from address and body of an email sent to your customers based on the product that they purchase. You can also customize the seller emails so that specific information is sent to the merchant’s email after a successful transaction of your product.
This functionality enables admin to create unique emails for each of their products. You can include a range of different merge tags in the body of both the ‘Buyer’ and ‘Seller’ emails so that specific information is dynamically included.
Customizing a Successful Purchase Email on a Per Product Basis
Step 1) Ensure that you have the Post Payment Actions Addon and the Stripe Payments Plugin installed and activated on your WordPress site.
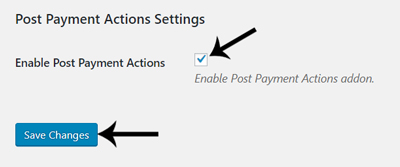
Step 2) Once the addon is activated, you will notice a new tab under the Stripe Payments Settings menu. The new tab will be titled Post Payment Actions.
Step 3) Mark the Enable Post Payment Actions checkbox and then click the Save Changes button. This allows the post payment functionalities to work.
Step 4) Now select the product you would like to add a customized email to. You can find your product or add a new product by clicking on the Products menu under Stripe Payments.
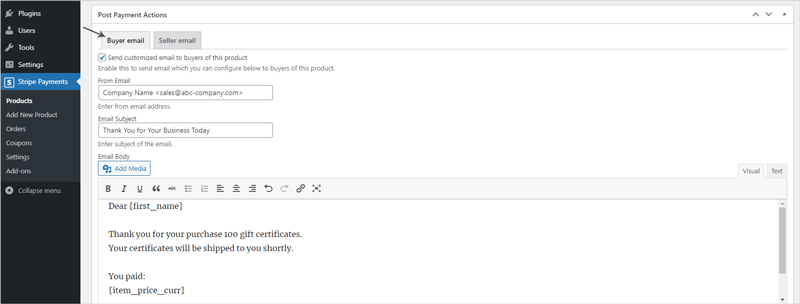
Step 5) On your products page locate the section titled Post Payment Actions. Mark the checkbox so that the customers who purchase this specific product will receive your customized email rather than the generic email (configured in the Email Settings tab of the Settings menu).
Step 6) Customize the Email Subject.
Step 7) Ensure the From Address is correct (includes your domain).
Step 8) Customize the Email Body to reflect the product/service that your customer has just purchased. You may like to include instructions that relate directly to that product. Note that this email will be sent automatically after a successful purchase of this product is completed on your website.
Step 9) Update your product to save your customized email.
Step 10) Complete a test transaction of this product to ensure the email is correct and punctual.
Customizing a Successful Seller Email on a Per Product Basis
When you have the Post Payment Action Email Addon you also have the ability to edit the successful purchase email sent to a seller (merchant) on a per product basis. Once you have the addon installed and activated, once you edit a product or create a new product, you will notice a ‘Post Payment Actions‘ section on the ‘Edit Product‘ page.
To edit the email sent to the ‘Seller‘:
- Make sure you have enabled the addon by clicking on the ‘Stripe Payments‘ ‘Settings‘ menu and then enabling it from the ‘Post Payment Actions‘ tab.
- Edit the product you wish to send customized post payment emails to the seller for. Scroll down to the ‘Post Payment Actions‘ section.
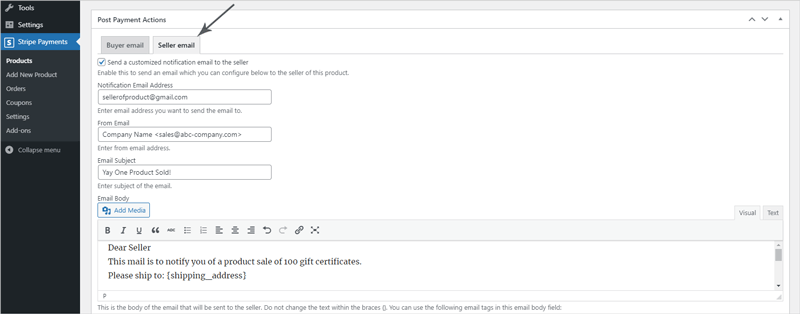
- Simply click on the ‘Seller Email‘ tab to edit the email sent to the ‘Seller‘ after a successful transaction of the product.
- Mark the checkbox next to “Send a customized notification email to the seller of this product“.
- In the ‘Notification Email Address‘ field, enter the email of the seller.
- In the ‘From Email‘ field, ensure the from email is correct, and includes your domain.
- You can edit the ‘Email Subject‘ and ‘Email Body‘ as you please to better suit the product you are selling. You may choose to add additional merge tags to include information about the purchaser within this email that will be sent to the seller. While adding additional merge tags is fine, we recommend that you do not delete the exisiting merge tags as these add vital information to the email body. Some of the merge tags you can add to the email body can be found by clicking the ‘toggle tag hints‘ button found beneath the email body field. You can also find email tags in the section below.
- Ensure you ‘Update‘ the product to ensure the changes you have made to the seller email are implemented.
Adding Email Tags to Send Additional Details to the Customer
Email tags can be included in a Post Payment Action Email to add dynamic details about the product, shipping, currency and purchase date.
Email tags that can be included in the body of a post payment email can be found below:
- {shipping_address} – Shipping address of the buyer
- {billing_address} – Billing address of the buyer
- {product_details} – The item details of the purchased product (this will include the download link for digital items)
- {transaction_id} – The unique transaction ID of the purchase
- {customer_name} – Customer name. Available only if collect billing address option enabled
- {payer_email} – Email Address of the buyer
- {purchase_amt} – The amount paid for the current transaction. Example: 1,000.00
- {tax} – Tax in percent. Example: 10%
- {tax_amt} – Formatted tax amount for single item. Example: $0.25
- {shipping_amt} – Formatted shipping amount. Example: $2.50
- {purchase_amt_curr} – The amount paid for the current transaction with currency symbol. Example: $1,000.00
- {item_price} – Item price. Example: 1000,00
- {item_price_curr} – Item price with currency symbol. Example: $1,000.00
- {currency} – Currency symbol. Example: $
- {currency_code} – 3-letter currency code. Example: USD
- {purchase_date} – The date of the purchase
- {custom_field} – Custom field name and value (if enabled)
Disable Sending Notification Emails on a Per-Product Basis
If you want to disable buyer or seller email notifications for a specific product, you can use the following checkboxes located in the Post Payment Actions section of that product’s configuration:
- Disable sending buyer notification email
- Disable sending seller notification email
Get the Stripe Post Payment Actions Addon

This is a one-time payment (includes 1 year of support and updates).
Alternatively, Choose to Bundle & Save
Get access to all our premium addons for the Stripe Payments Plugin, auto-updates and guaranteed support.
Click on the following banner to learn more.