The Stripe Payments Plugin comes with an additional feature that allows you to ask your customers a simple question before they proceed to checkout. You can choose to provide your customers with a field where they can enter in an answer, or a checkbox that they can select if the information applies to them.
This feature works well if you require any additional information from your customers for the products you are selling. For instance, you may need to know what they would like engraved on a physical product or would like to collect customer data for future reference.
How to Create a Custom Field
Once you have installed this plugin, you can create one custom field of your choosing. You can then apply this field to a selected product or to all of your products.
- Click on the ‘Settings‘ menu under the ‘Stripe Payments’ plugin.
- Click on the ‘Advanced Settings‘ tab.
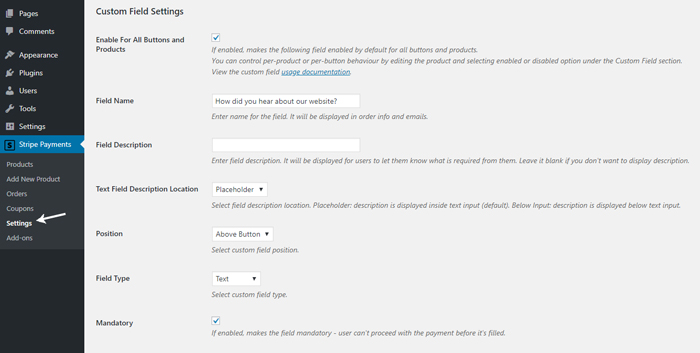
- You will see a section titled ‘Custom Field Settings‘. This is where you can enter in the information regarding your custom field.
- Select the checkbox if you would like to enable your custom field globally across all your products. Your custom field will then show up on all your products.
- Enter in a field name and description.
- Choose where you would like to display your description.
- Choose if you’d like your custom field to be displayed above or below the button.
- Select the field type that corresponds to your question/information. You can choose to require text from your customers or supply them with a checkbox.
- Choose if you would like your field to be mandatory. This means your customers will not be able to proceed until filling out an answer.
Applying the Custom Field to Your Products
Option 1) Globally Apply it to All Products
You can apply the custom field to all your products globally by selecting the Enable For All Buttons and Products checkbox. When this checkbox is checked, it will automatically show the custom field for all your products.
Option 2) Apply it to Some Products Only
It is likely that you want to collect info for only one or a few products. This is where the product specific option comes in handy.
Keep the Enable For All Buttons and Products checkbox checked in the settings menu of the main plugin. Then edit the individual product in question and enable or disable the custom fields on a per product basis.
Here is how to enable the option on a per product basis:
- Click on the ‘Products’ menu under the ‘Stripe Payments’ plugin.
- Choose the product you wish to apply your custom field to.
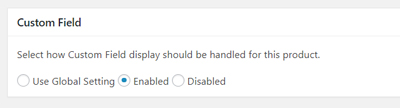
- Once you are in the product editor, you will see a section titled Custom Field.
- Click the ‘Enabled’ option.
- ‘Update’ the product.
- Now your custom field will show up on this product.
Viewing Your Customer’s Response from the Custom Field
After a customer has successfully completed a transaction for a product that has a custom field, you can view their responses under the ‘Orders’ menu.
- Click on the ‘Orders’ menu, under the ‘Stripe Payments’ plugin.
- Click on the transaction that has taken place.
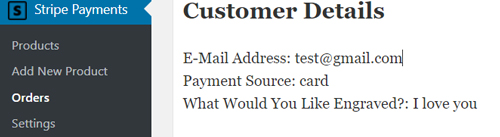
- Under the ‘Customer Details’ you will be able to review the customer’s response to your custom field. You can then use this information to fulfill the customer’s order.
Adding the Custom Field Information to an Email
This plugin allows you to add the custom field information to the automated sale notification email.
- Click on the ‘Settings’ menu under the ‘Stripe Payments’ plugin.
- Select the ‘Email Settings’ tab.
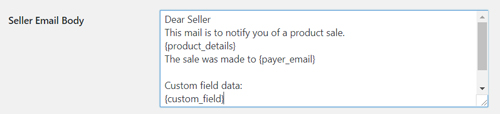
- You can use the following email merge tag in the buyer and seller email body to include the custom field information in the email:
{custom_field}
Need Many Custom Fields?
If you want to configure a few custom fields to collect extra details from customers at the time of checking out, you can use the additional custom fields addon for Stripe payments plugin.